External Docker access with Cloudflare Tunnels

Side note: Thank you GPT4 for generating the headline image
Over the past handful of weeks I have been growing more and more enjoyment for launching small Docker instances on my Synology NAS and figured I would share more information about my setup.
This article assumes you have prior knowledge of Docker.
Introduction
In this article, we will explore the process of granting external access to your Docker container using Cloudflare Tunnels. We will cover the setup and configuration required to achieve this, along with best practices.
Setting Up Cloudflare Account & Domain
First things first. Let's get a domain name. Head to any domain provider (GoDaddy, NameCheap, etc.) and purchase a domain of your liking.
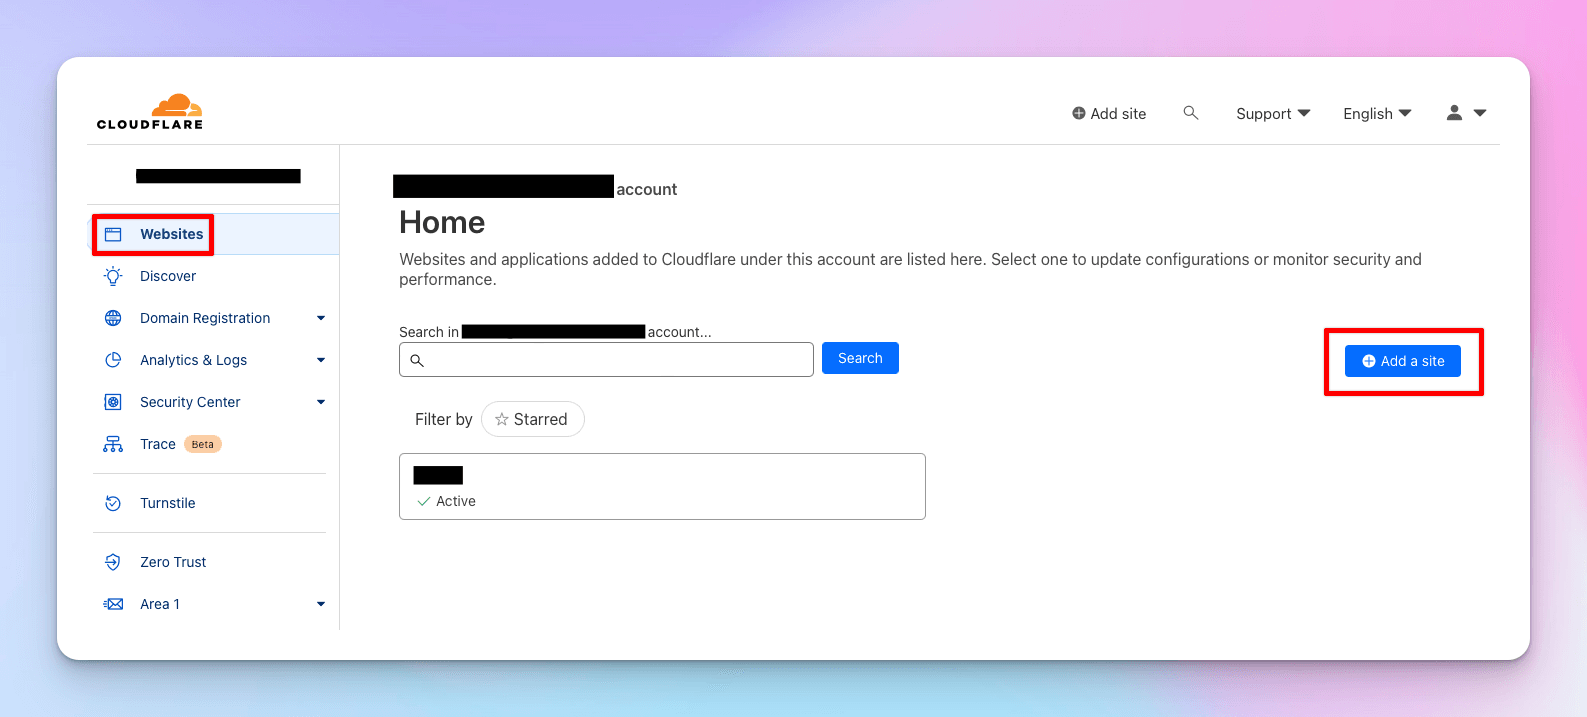
Once you have a domain, head over to Cloudflare and create an account. We will now add our new domain by going to the home dash and clicking Websites -> Add Site.

Fill in the information required to add the site and confirm ownership.
Creating a Cloudflare tunnel
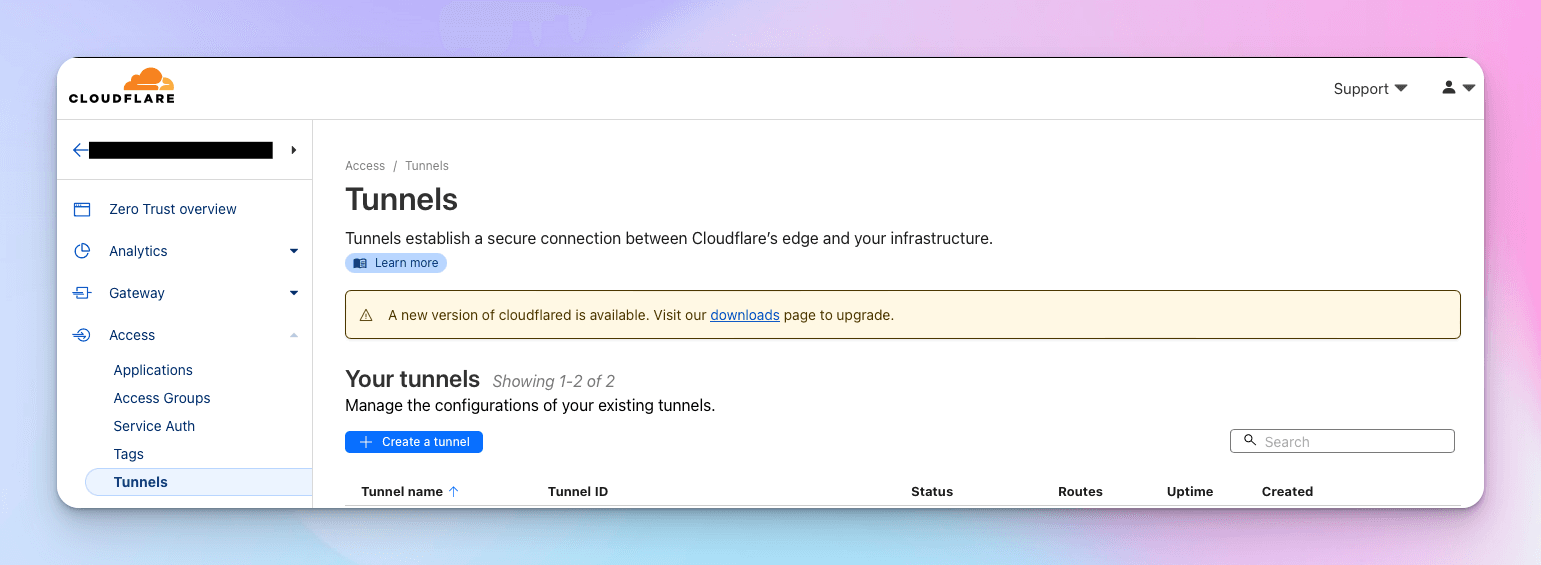
Next, we need to head over to Cloudflare's Zero Trust area. This is where all configuration portaining to the Cloudflare tunnel lives. Under "Access", you will see an option to click "Tunnels"

Click "Create a tunnel" and it will walk you through the creation process. First you will enter a name for the tunnel, it can be anything you like.
The second step is the important one
At the top when asking you to "Choose your environment", click "Docker" and it will show you how to install and run the connector. You should see code that looks something like the following:
docker run cloudflare/cloudflared:latest tunnel --no-autoupdate run --token
eyJhIjoiNGE2ZDkwMDg02334322UwMjllYjgzOGExZGJmZWiNzEzYmE4ZDYtNjM3OS00NmExLWFjOTMtNzhlMDA0MGRlYTlmIiwicyI6Ik9ETTRZVFJtT1RBdFpXWmhaaTAwWkRKbUxXSADFATFZamN0T1Rsal343ltWTFPRFk1TkRGaiJ9
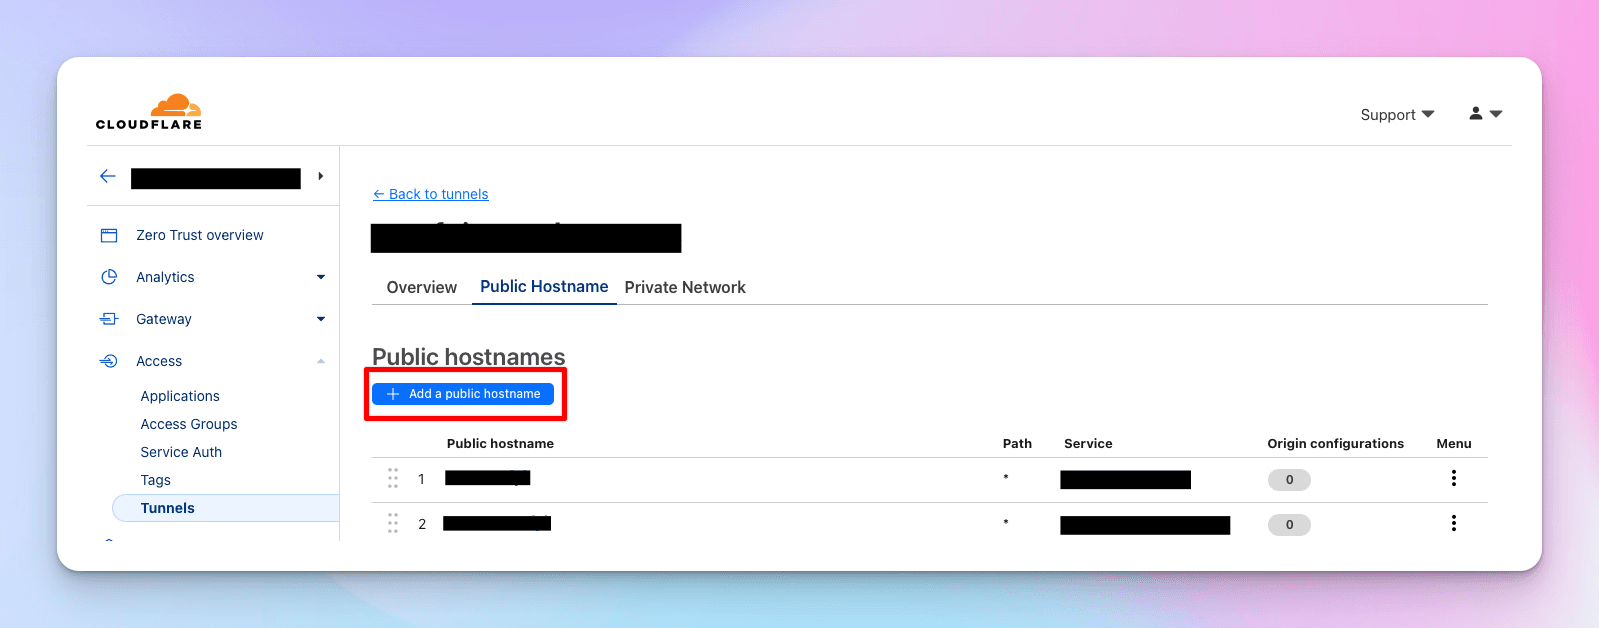
This is what you will run on your local machine. Once you have run this, you should see a success message that it has connected successfully. Now, on your tunnels home page, click over to "Public Hostname" and you should see an option to "Add a public hostname"

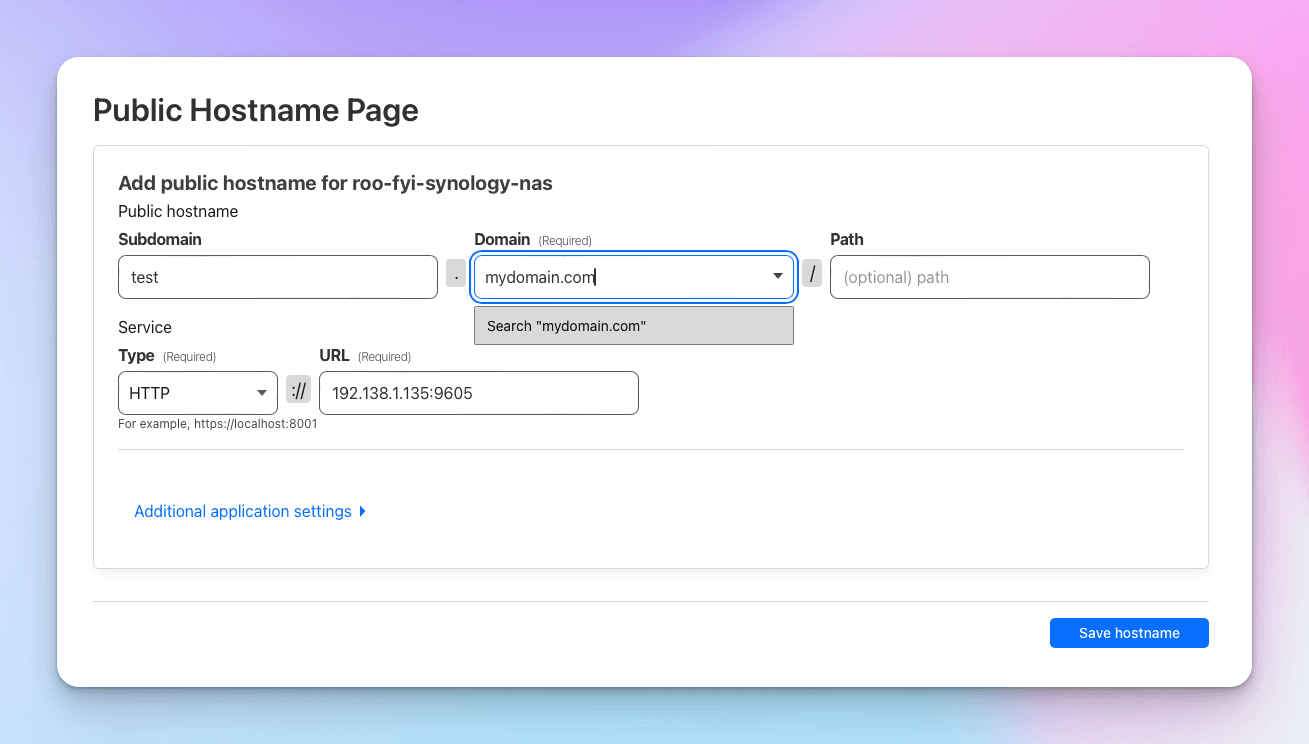
Once you are at the add hostname page, you will want to enter the subdomain you'd like to access the docker image of your choice from. In "Domain" you will chose the domain that you had registered with Cloudflare in step 1. Lastly, you want to click HTTP and enter in the local URL of the docker container you want to expose.

Boom! Once clicking save, you should be able to navigate to that hostname you just setup, test.mydomain.com and you should be able to access your local Docker image!