
Automated web scraper deployed to Heroku
Over the weekend I had to book an appointment online. Unfortunately, the earliest appointment available was in August of 2024... I had no other option but to book. That being said, the website offered a "reschedule" functionallity in which you could see the latest open appointments and if someone cancels or moves an appointment, the calendar would reflect that and you would be able to book a potentially earlier time.
I told myself that wasn't terrible and I am sure that someone would cancel and I could "jump the line" so to speak. Did I was want to be responsible to remeber to go on each day, pan through the appointments, hope that I had beaten anyone else to it, and then book? It felt like that method was prone to someone else beating me to it. This is when I decided, why not dust off the coding gloves and write a script that automatically checks for open appointments and then notifies me via a Telegram bot? Boom. Perfect weekend project.
Python scraping with Selenium
First and foremost, you have to be able to do this locally with Python and Selenium. I had some minor experience in the past, but for the most part, simply used my handy friend ChatGPT.
Go ahead and create a new directory and you can create a scrape.py file. For the purposes of this article, I will simply show you how to setup the infrastrcture, and leave the Selenium deep dive up to you for your specific use case. There is a lot of great material online for how to become a Selenium expert.
from selenium import webdriver
import asyncio

async def main():
    # MAIN APPLICATION
    print("Hello, World!")

if __name__ == '__main__':
    loop = asyncio.get_event_loop()
    loop.run_until_complete(main())
Here is our main scrape.py file. As you can tell we import Selenium and asyncio. Asyncio is used for asynchronous tasks, which we will get to in the Telegram bot section.
Now when you run python3 scrape.py you should see your terminal output:
Hello, World!
Next, we need to actually set up our Selenium driver.
from selenium import webdriver
import asyncio

options = webdriver.ChromeOptions()
options.add_argument("--headless")
options.add_argument("--disable-dev-shm-usage")
options.add_argument("--no-sandbox")
options.add_argument("--window-size=1920,1080")
options.binary_location = os.environ.get("GOOGLE_CHROME_BIN")
driver = webdriver.Chrome(
    executable_path=os.environ.get("CHROMEDRIVER_PATH"), chrome_options=options)

async def main():
    # MAIN APPLICATION
    print("Hello, World!")

if __name__ == '__main__':
    loop = asyncio.get_event_loop()
    loop.run_until_complete(main())
There are a few key things to call out here when creating the webdrivers options.
--headless: This ensures that Selenium is running in headless mode. i.e. no GUI will popup when running. This is key for when we deploy to Herokuos.environ.get("GOOGLE_CHROME_BIN"): These environment variables are needed so that when deployed on Heroku it properly sets the execution path of the Chrome Driver
Deploying to Heroku
Now that everything was working for me locally, it was time to get it deployed to an infrascture that can run it whenever I wanted it to! After some Googling, I found this extremely helpful article that outlined how to get this deployed to Heroku. They also have a YouTube tutorial linked in the README.md.
First off, ensure you have a Heroku account. You will go ahead and create a "new app" and then can link this repo to the pipeline.
There are two important steps you need to do to ensure it runs smoothly on Heroku.
-
- Create a
Procfile
- Create a
-
- Create a
requirements.txt
- Create a
The Procfile specifies what commands should be executed on startup. Our Procfile will look very simple like so:
worker: python scrape.py
The tutorial video has it as web instead of worker but I believe that worker is more suitable for this sort of background job that doesn't require inbound requests.
Lastly, a simply requirements.txt file is needed to tell Heroku what packages you need.
selenium==4.6.1
python-dotenv==1.0.0
python-telegram-bot==20.4
We need Selenium, of course. Additionally, I have used python-dotenv to help load environment variables locally, and python-telegram-bot to handle the Telegram messaging, which we will get to shortly.
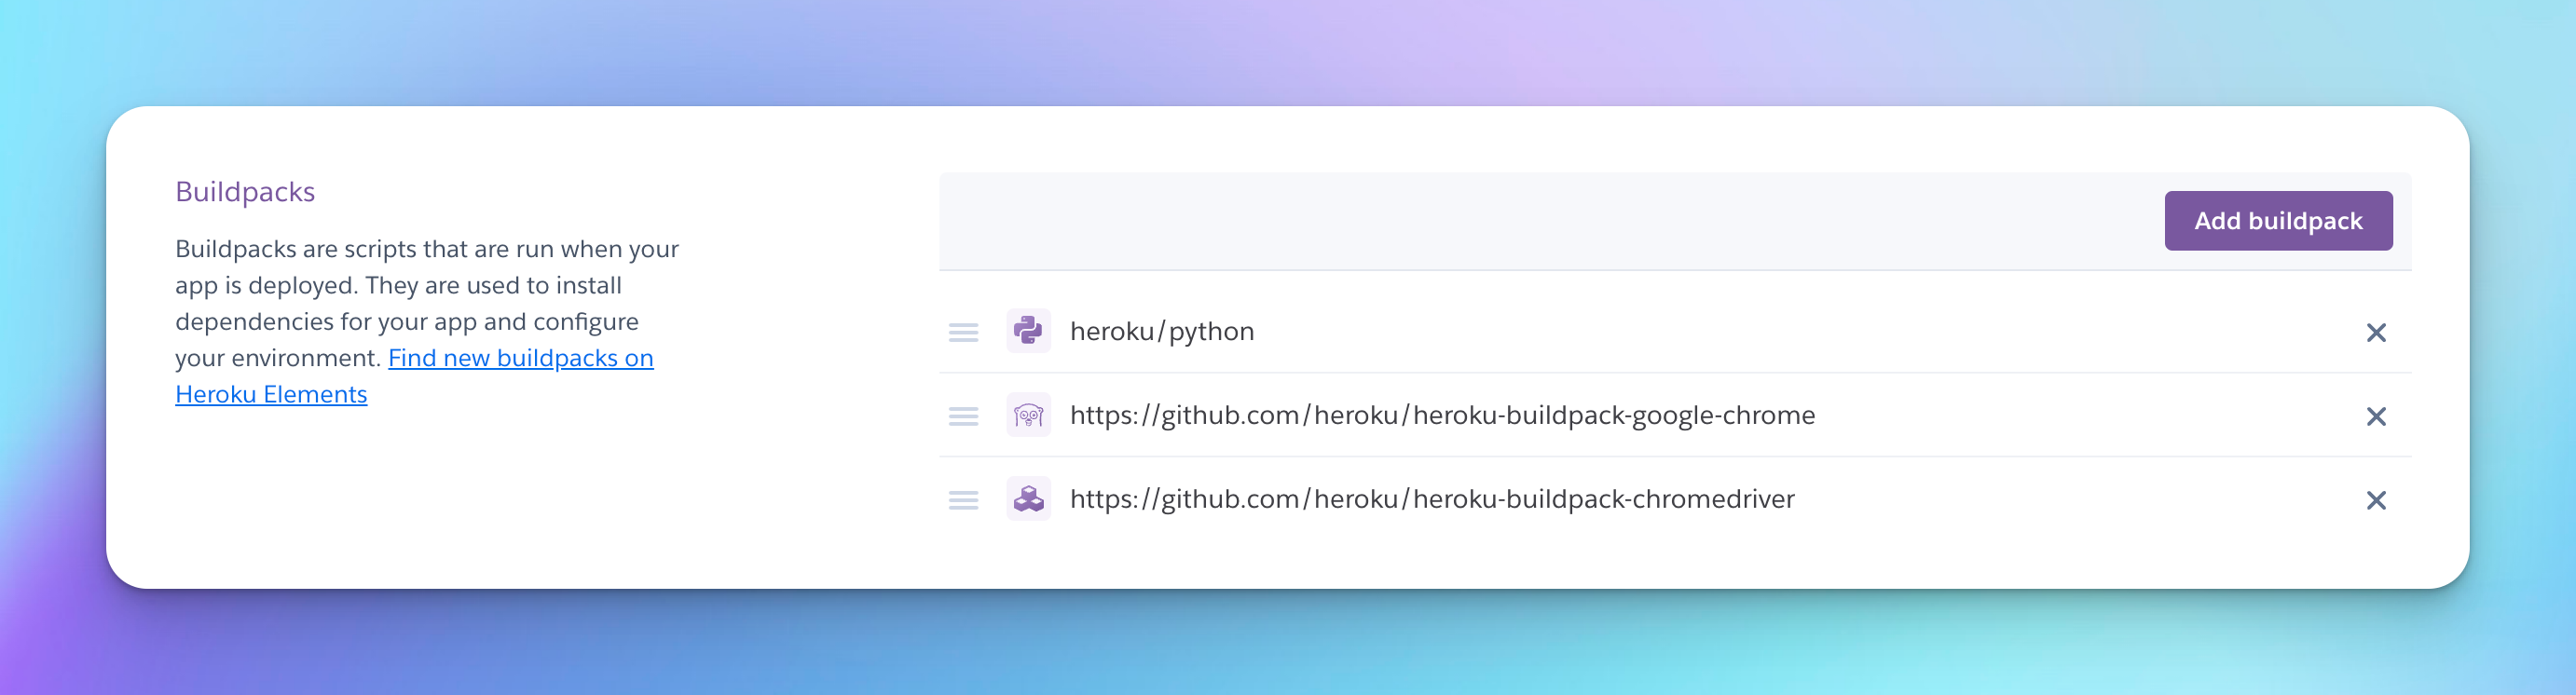
Next, we need to add Buildpacks to our app. Buildpacks are scripts that are run when your app is deployed. There are 3 that we need to add:
Python: heroku/pythonChrome: https://github.com/heroku/heroku-buildpack-google-chromeChromedriver: https://github.com/heroku/heroku-buildpack-chromedriver
You can do this by going to the apps setting page and scrolling down to the Buildpacks section. Click the Add buildpack button and add the 3 above. By the end, yours should look like so:
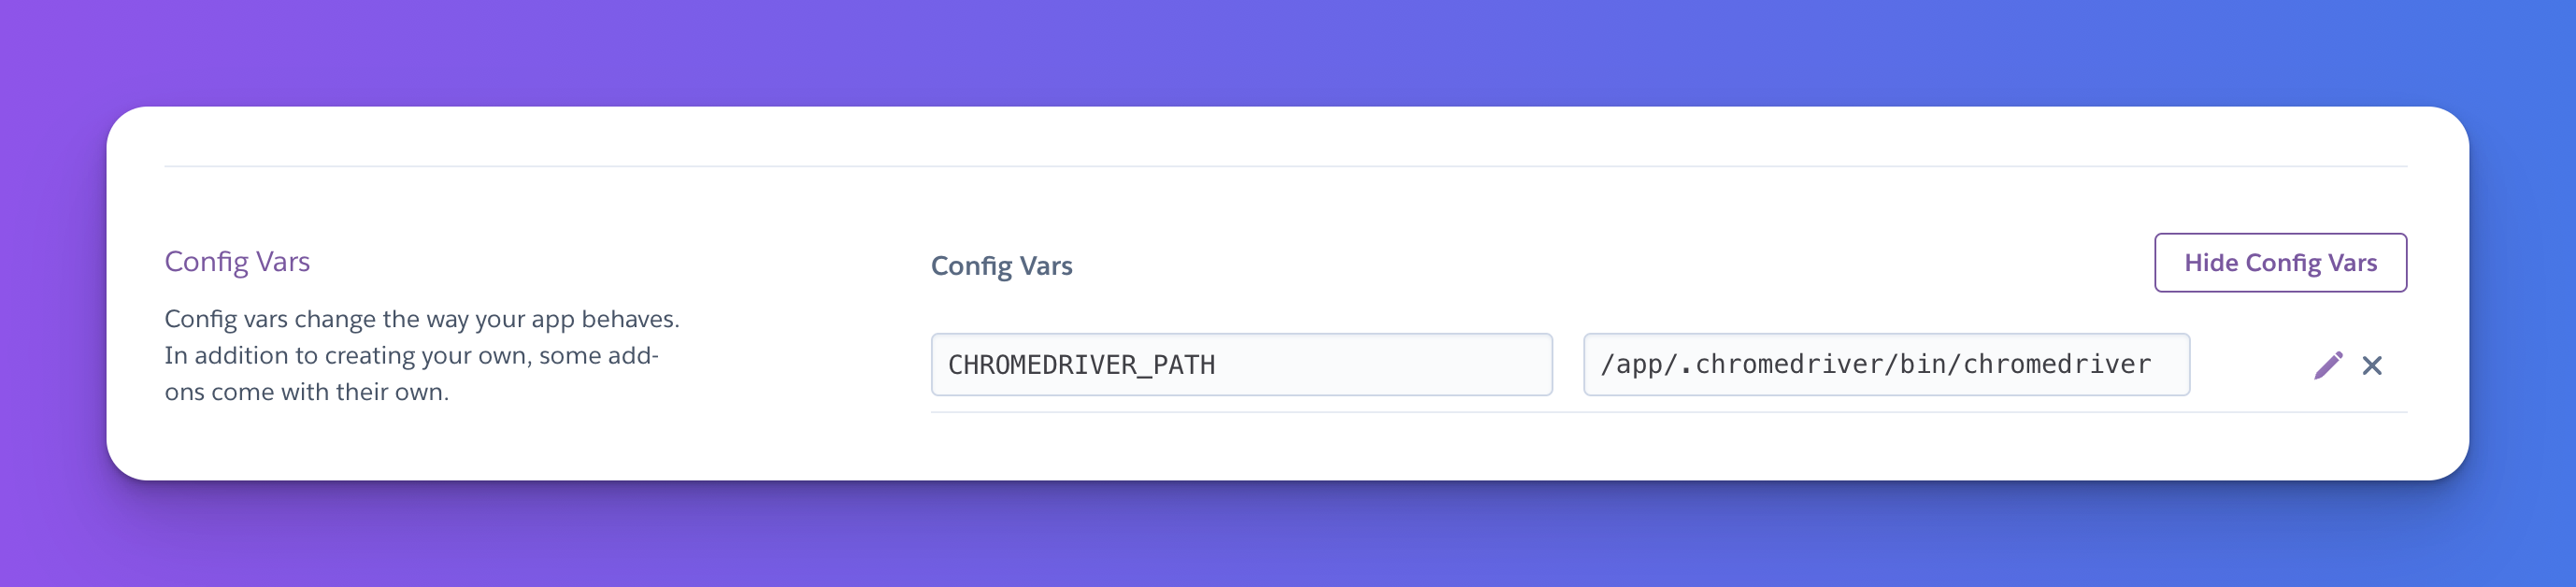
The last thing we need to do is to set the CHROMEDRIVER_PATH environment variable that we had discussed earlier! Head to your apps settings page and under the Config Vars section you can add the following:
/app/.chromedriver/bin/chromedriver
Congrats! You have successfully deployed your script to the Cloud!
You can now use the Heroku CLI to run the job. Once setting up the CLI and logging in, try running:
heroku run python scrape.py
You should see the same output that you had seen locally.
While this is a great milestone, having to run this manually, even though on the cloud, still doesn't provide that automatic benefit we were looking for. In comes scheduling addons.
Automate runs with Advanced Scheduler
The most powerful part! Automation!
We need want to run this at a specific time interval. For this particular use case, I wanted this to run every 10 minutes.
Go over to the "Resources" tab on your app and search for Advanced Scheduler. They have a 7 day free trial, or a really generous Premium 0 Tier which gives 50,000 invoctions per month for only $15.
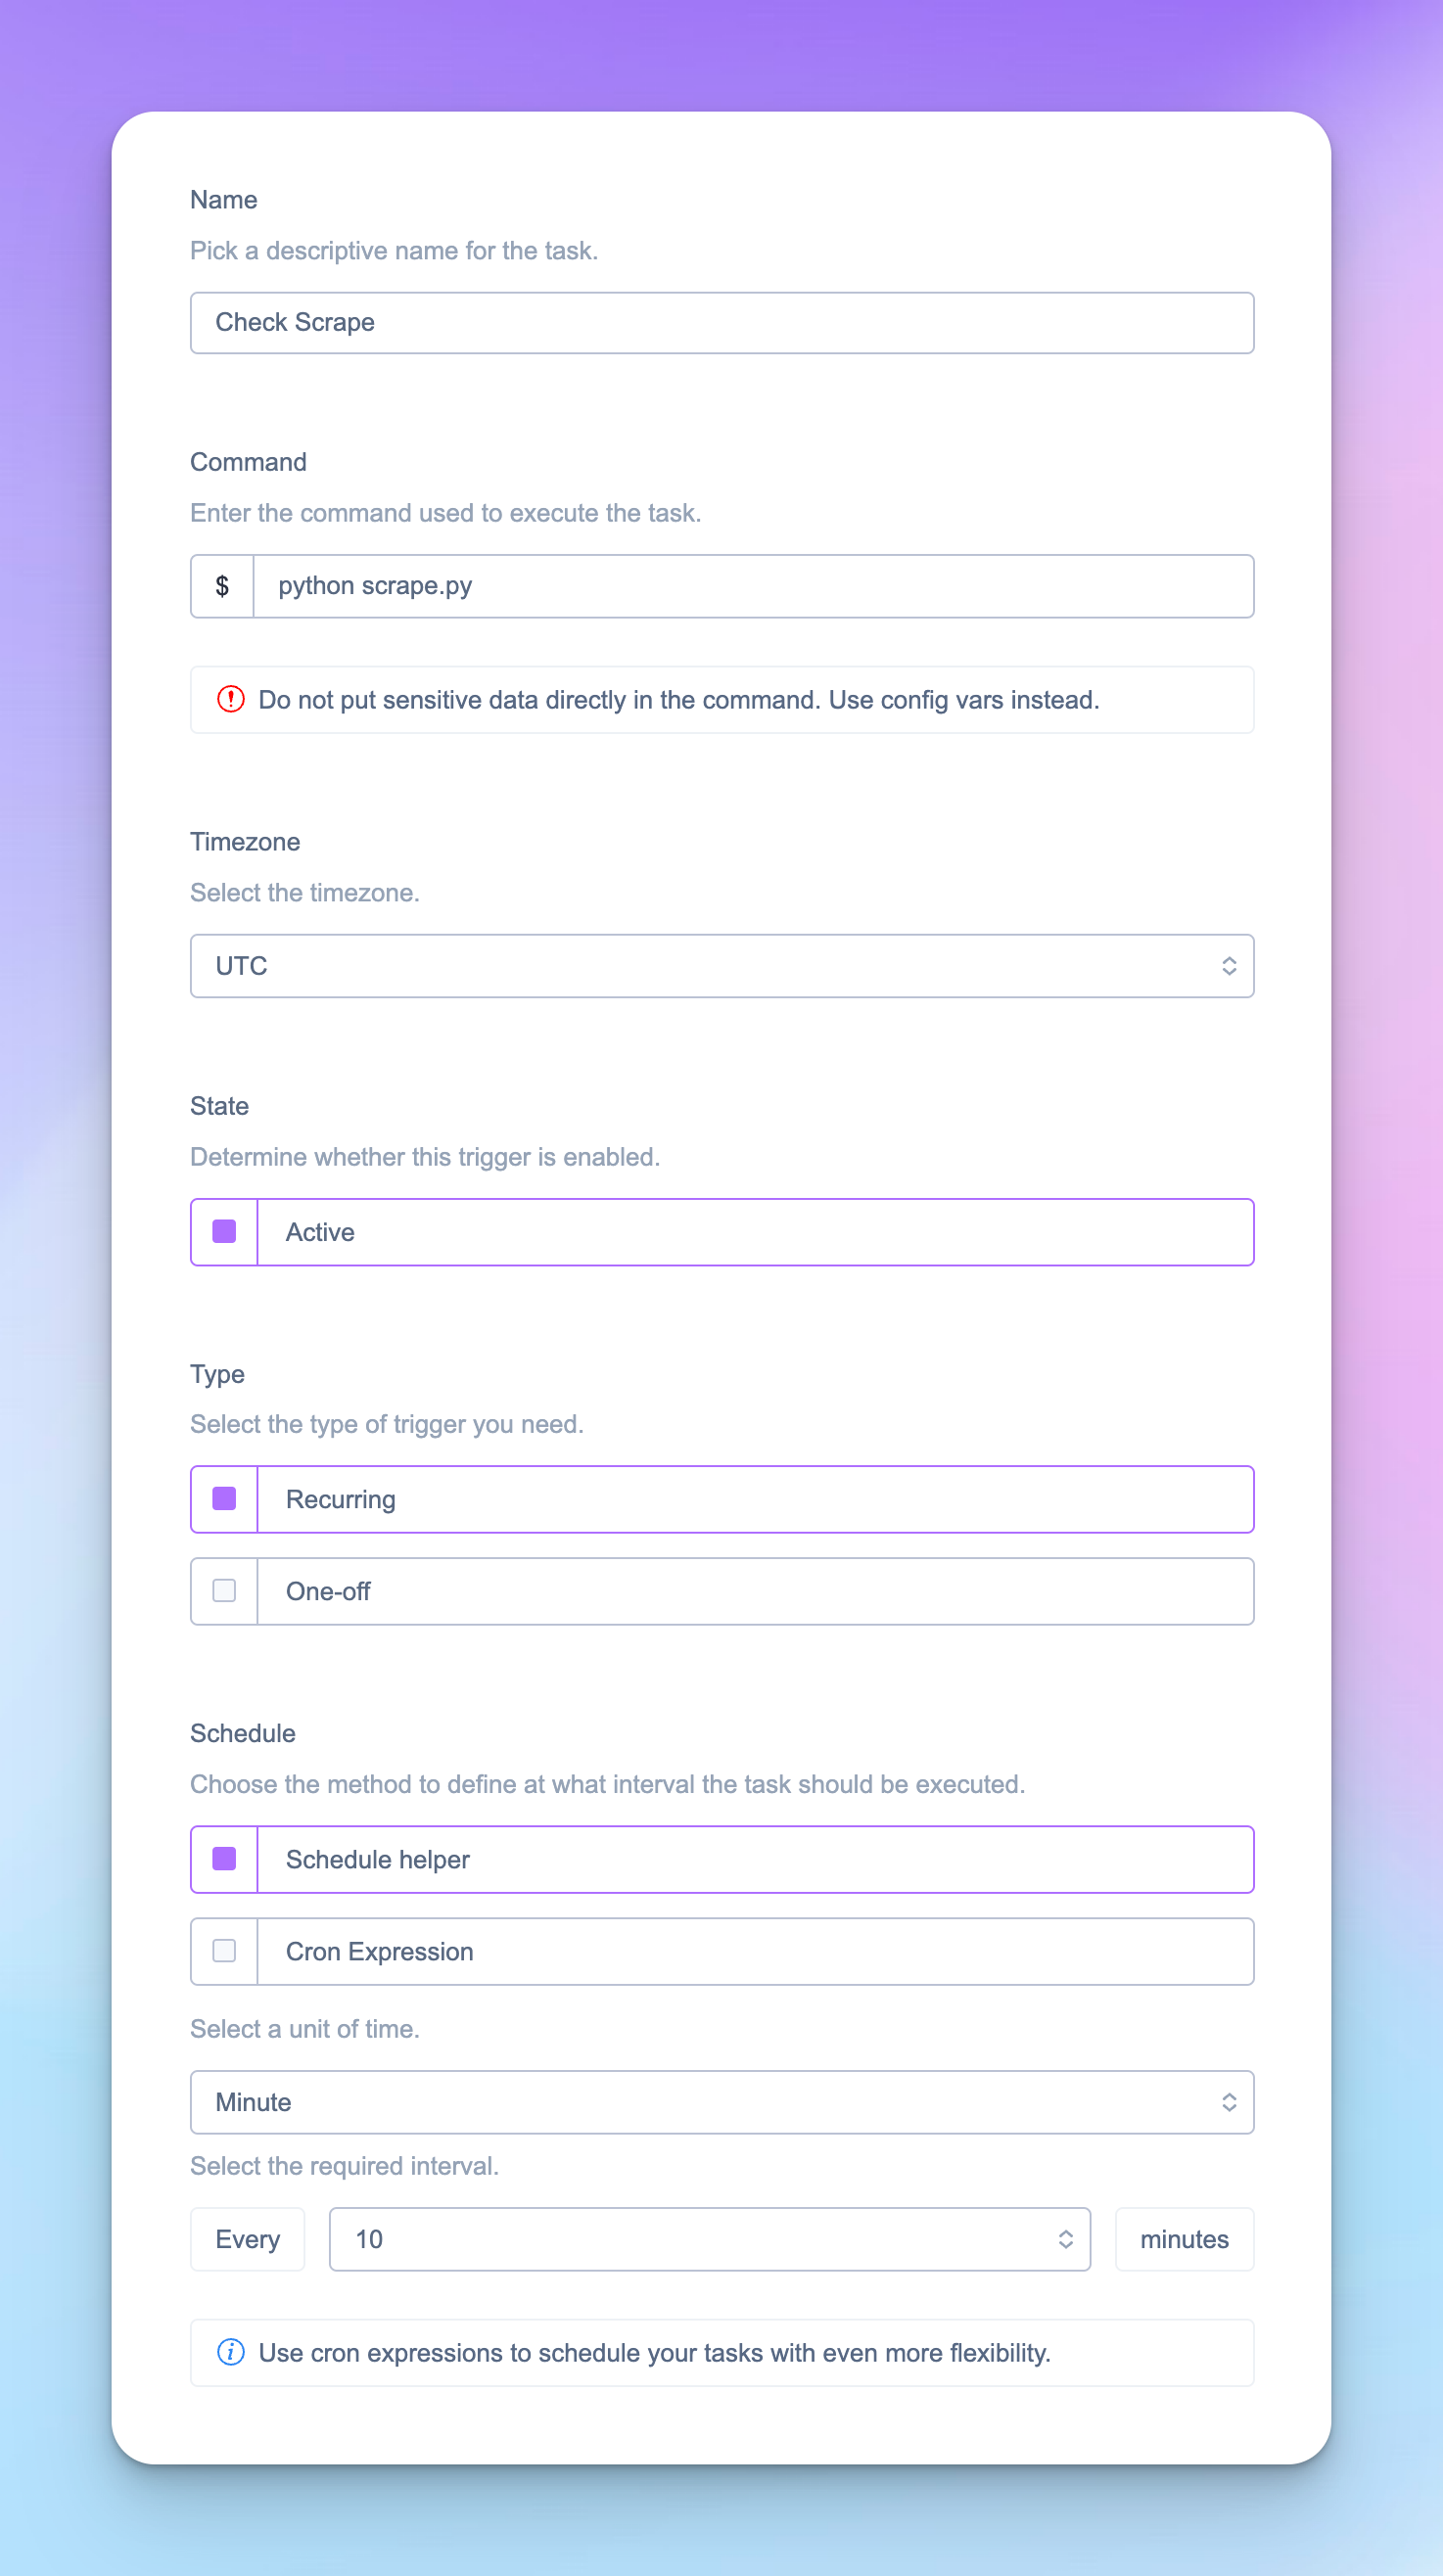
When you've gone ahead and added that go the advanced scheduler page and click "Create Trigger". Chose a name and the type of scheduling you want. The key thing is the Command. This is similar to what you would run on the Heroku CLI.
python scrape.py
This tells the scheduler to run this at the expected interval. When you are all done the configuration should look something like this:
One thing you should always ensure is that you are never over burdenning the site that you are interacting with. Be respectful, don't spam.
And boom. Your script will now run in the cloud at that set interval indefinitely.
Message in Telegram
Of course, you want to be notified when in fact, your script does find something interesting. Incoming Telegram bot.
This was my first time doing this and it was rather straightforward. First things first, you need to reach out to the BotFather. Message them with a /newbot command. This will ask you a few questions and then spit out a token! Ensure you keep that token safe.
Next, to find out your userId, which will be used as the "group" for the bot to message, go ahead and message userinfobot and it will respond with the id.
Once you've created the bot, ensure that you message that bot at least once or all the API calls will fail. This is a security measure from Telegram to ensure that random bots can't spam you first.
Now we go ahead and add the python telegram package:
pip3 install python-telegram-bot
And in our code, we setup the bot:
from selenium import webdriver
from telegram import Bot
import asyncio

options = webdriver.ChromeOptions()
options.add_argument("--headless")
options.add_argument("--disable-dev-shm-usage")
options.add_argument("--no-sandbox")
options.add_argument("--window-size=1920,1080")
options.binary_location = os.environ.get("GOOGLE_CHROME_BIN")
driver = webdriver.Chrome(
    executable_path=os.environ.get("CHROMEDRIVER_PATH"), chrome_options=options)

# Telegram bot
bot = Bot(token=os.environ.get("TELEGRAM_BOT"))
user_id = os.environ.get("TELEGRAM_USER_ID")

async def main():
    # MAIN APPLICATION
    print("Hello, World!")

if __name__ == '__main__':
    loop = asyncio.get_event_loop()
    loop.run_until_complete(main())
You can store the TELEGRAM_BOT and TELEGRAM_USER_ID in environment variables (recommended) or just replace the os.environ.get() with the values that we had retrieved from above.
And now to the good stuff - send the message! I went ahead and just created a helper function that sends a message to us, the user:
async def send_msg(txt):
    await bot.send_message(chat_id=user_id, text=txt)
Now all we need to do when we find something we want to message is call that function!
...

async def send_msg(txt):
    await bot.send_message(chat_id=user_id, text=txt)

async def main():
    # MAIN APPLICATION
    await send_msg("Hello, World!")

if __name__ == '__main__':
    loop = asyncio.get_event_loop()
    loop.run_until_complete(main())
There you have it... an end to end scraper that is deployed in the cloud working for you around the clock!