Passwordless Auth

Recently, we noticed that our authentication page had created friction with our users. Whether it was the inability to remember the password or setting up the auto-generated password on another device and the current one not syncing, we found there to be somewhat significant drop-off here.
We figured that we needed some way to more easily authenticate them. We decided we would embark on a journey of passwordless auth via a magic email link. Lot's of out-of-the-box auth providers (Firebase, Supabase, NextAuth, etc.) have provided ways to do this so we figure that users are becoming more familiar/comfortable with this notion. While we will continue to have normal email/pass authentication, this strategy would work if you decided to take this approach from the get-go.
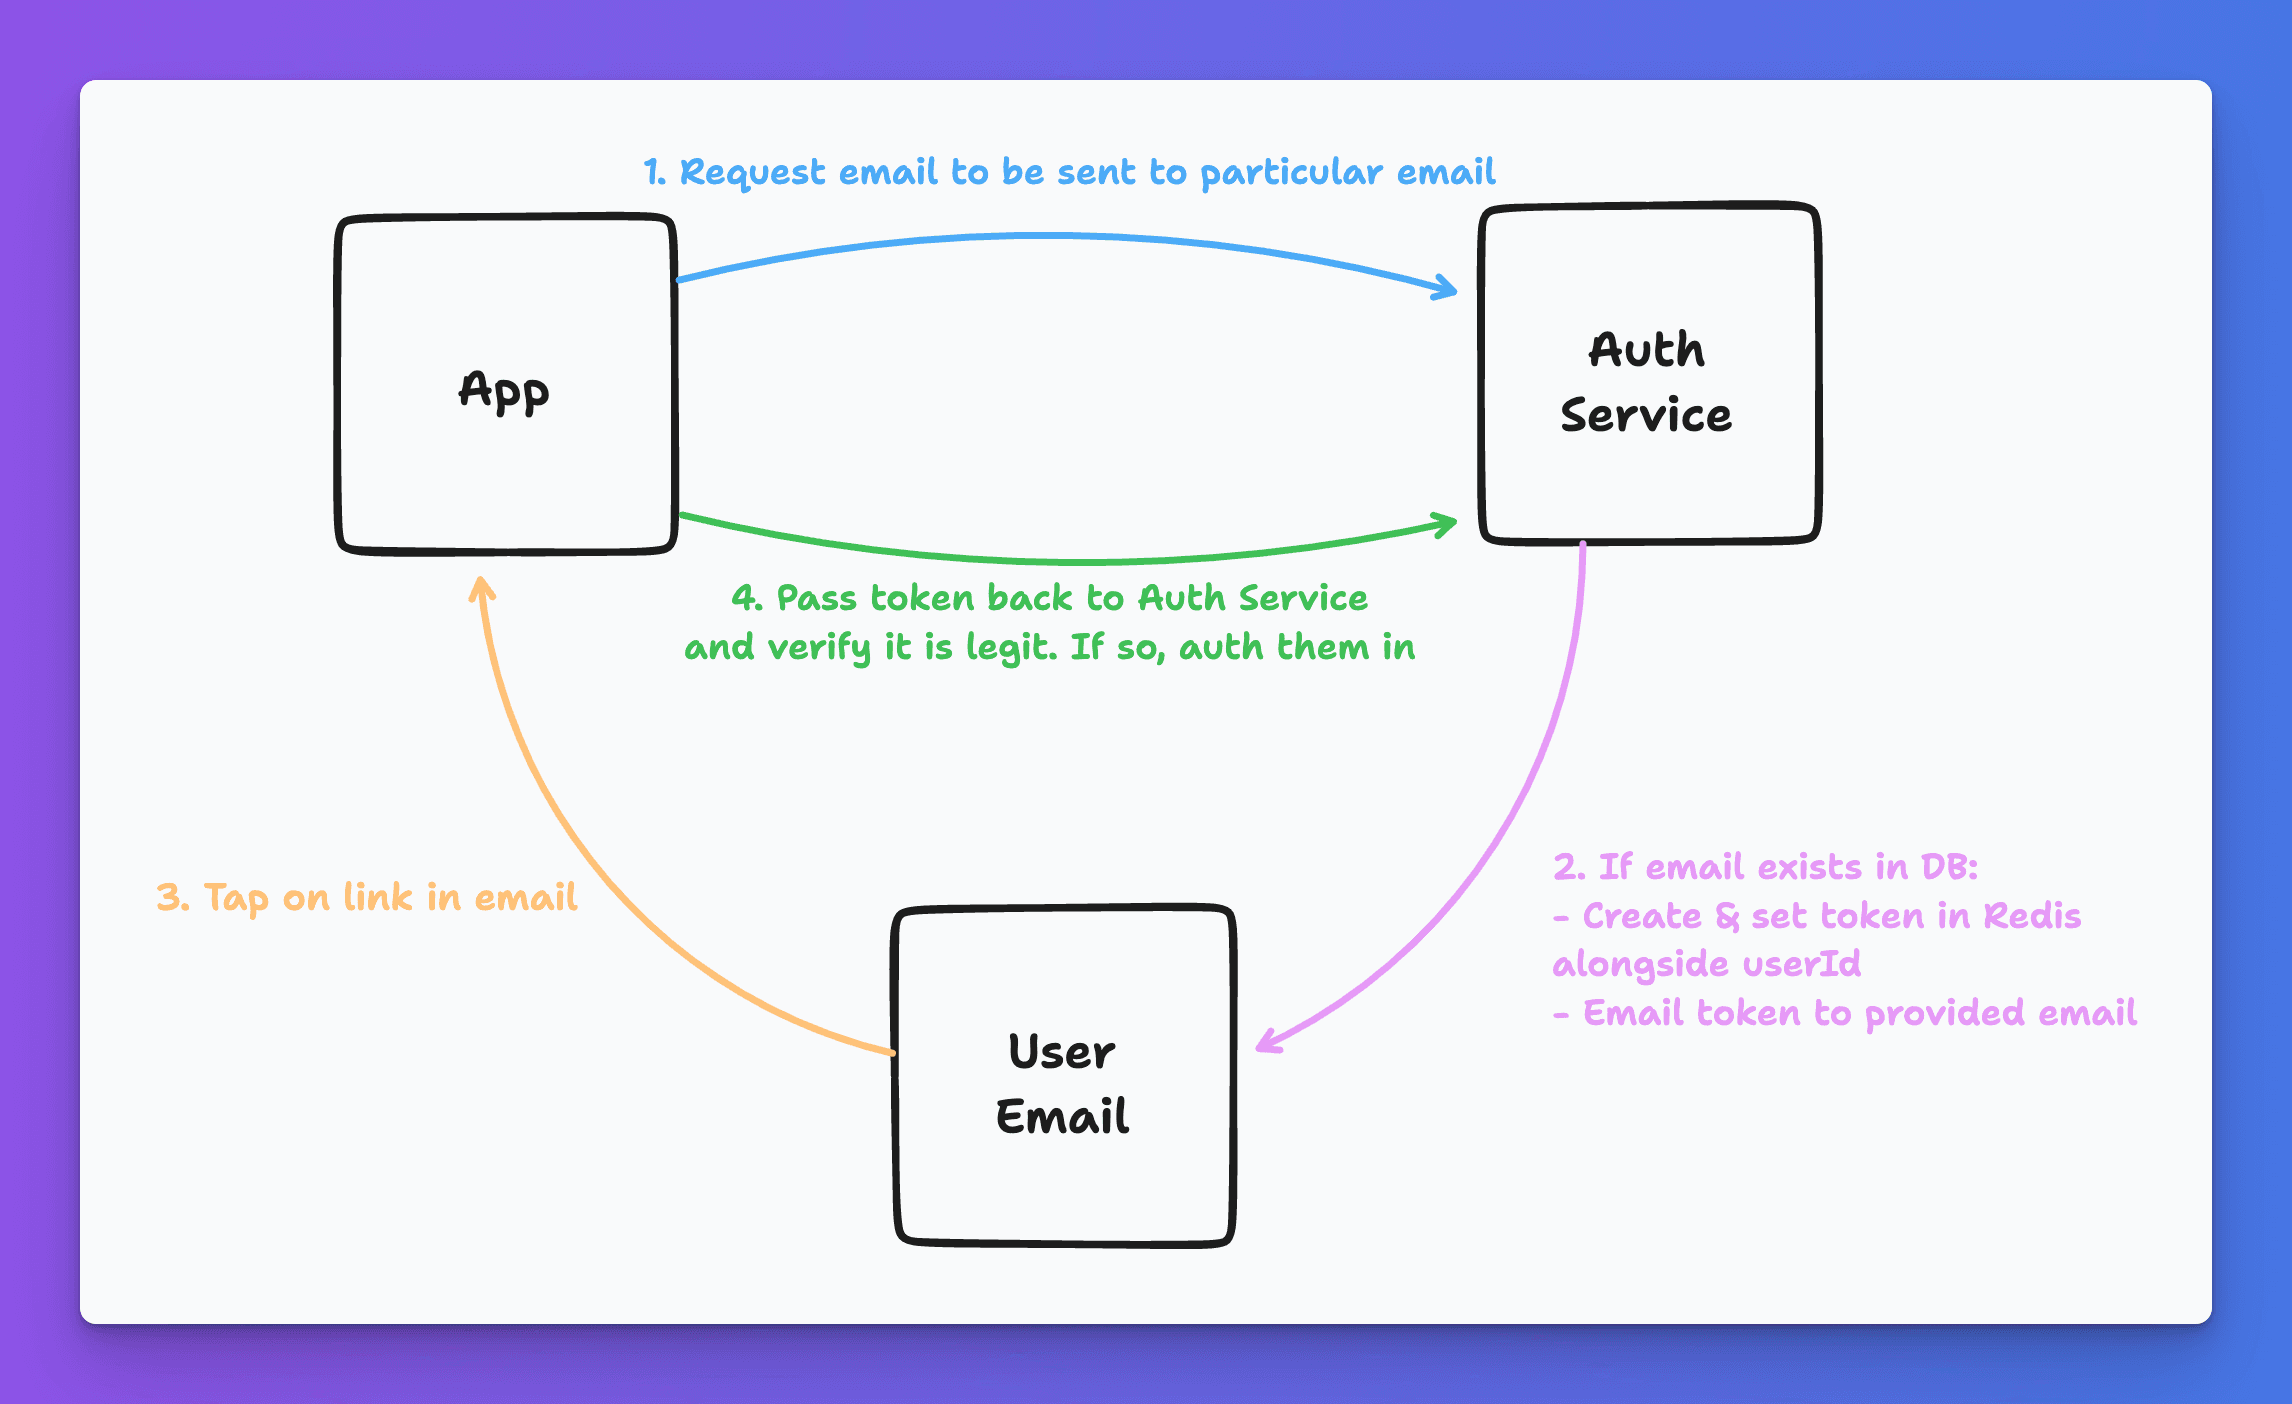
In order to accomplish this, we were going to utilize our good friend Redis to help with the management (and most importantly expiration) of these tokens. At a high level we will want to:
- Request a link be sent to a given email
- We will generate a unique token for that email auth with an expiration
- Send the email and have the user click on said link
- Validate that token and authenticate
Step 1: Request a link
First things first. We need to know what user is "attempting" to authenticate. It may look something like:
As you can tell, the primary CTA says Send magic email link when there is no password inputted, but as soon as they input a password, it will change to Sign in. There may obviously be some bettern design patterns, but hey, it works for the time being.
We will now take the inputted email and pass it to our backend Auth Service
Step 2: Generate unique token
The Auth Service has now received a request to generate a login/signup url for a given email address. First thing we would need to do is validate that the user even exists.
let user = await prisma.user.findFirst({
  where: {
    email: {
      equals: input.email,
      mode: 'insensitive',
    },
  },
})
This will go ahead and find us a user with the given email (case insensitive search).
Note: I always recommend that regardless of finding a users email, to send some confirmation to the client like "If a user is associated with that email you will receive an authentication link". It prevents malicious actors from just spamming a bunch of emails in to see what users exist in your DB.
Now that we have a user, we will simply generate a unique token for this user and store it in Redis alongside their userId:
const token = uuid()
await redis.set(`token:${token}`, user.id, 'EX', 60 * 5)
Let's break this down:
- Create a key
token:${token}which in theory will look like:token:11bf5b37-e0b8-42e0-8dcf-dc8c4aefc000 - Set the value of that key to the user id of the user requesting the link
- Set TTL to 5 minutes. This prevents this token from ever being long-lived
Step 3: Email token
Well, this has got to be the easiest part of the experience. Simply send the requested email some link that contains the token. This token will be important for validation in step 4.
await emailClient.email(
  user.email,
  `Go to this link to sign in: https://roo.app/auth/passwordless?token=${token}`
)
Step 4: Validate token & authenticate
Here comes the time we've been waiting for: lift off. When the user clicks on the link and is directed to your site you must validate the token. If using a framework such as Next.js you could envision having an /auth/passwordless page:
export const getServerSideProps: GetServerSideProps = async (context) => {
  const token = context.query.token

  // Validate the token
  const data = await redis.get(`token:${token}`)

  // If we don't have data that means that the token never existed
  // Or the token was auto-expired with the 5 minute TTL!
  if (!data) {
    return {
      redirect: {
        destination: '/auth',
        permanent: true,
      },
    }
  }

  // If we pass that - we simply delete the key and go ahead and do what we would normally
  // do if user passed standard email/pass validation

  // delete key to ensure it's used only once
  await redis.del(`token:${token}`)

  // create session

  // set cookies

  // etc..

  return {
    redirect: {
      destination: '/',
      permanent: true,
    },
  }
}
Voila! You now have a way to authenticate a user by simply sending a custom link to their email.
Taking this further
There are certainly more ways to build upon this. One thing that comes to mind is redirect urls. As you are taken away from the application, you won't necessarily have context as to where the user was originally heading before hitting the auth wall. You could extend this by storing that value somewhere and then append it to the email link that you send out.